

Using Lists
- The My Lists feature helps you save time by storing frequently purchased items for quick reordering. It’s perfect for seasonal orders, repeat purchases, or organizing products for specific projects.
1. Accessing My Lists
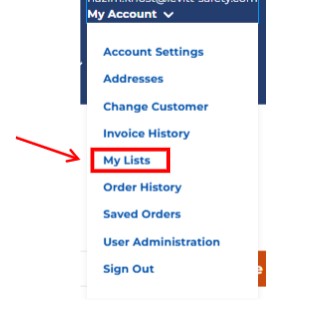
- Log in to your account and navigate to My Account → My Lists
- Click Create List to start a new list.
- Enter a List Name and, if needed, add a description to help identify its purpose.

2. Adding Products to a List
You can add items to your list in several ways:
- From a product page or category page: Select your desired quantity, then click Add to List.
Bulk upload: Upload multiple items at once using a pre-formatted Excel or CSV file.
Click Upload Items, download the template, fill in product details, and reupload.
Direct entry: Manually enter the product number or part number directly on the list page.
Once added, you can update the quantity and unit of measure (UOM) at any time.
3. Managing Your Lists
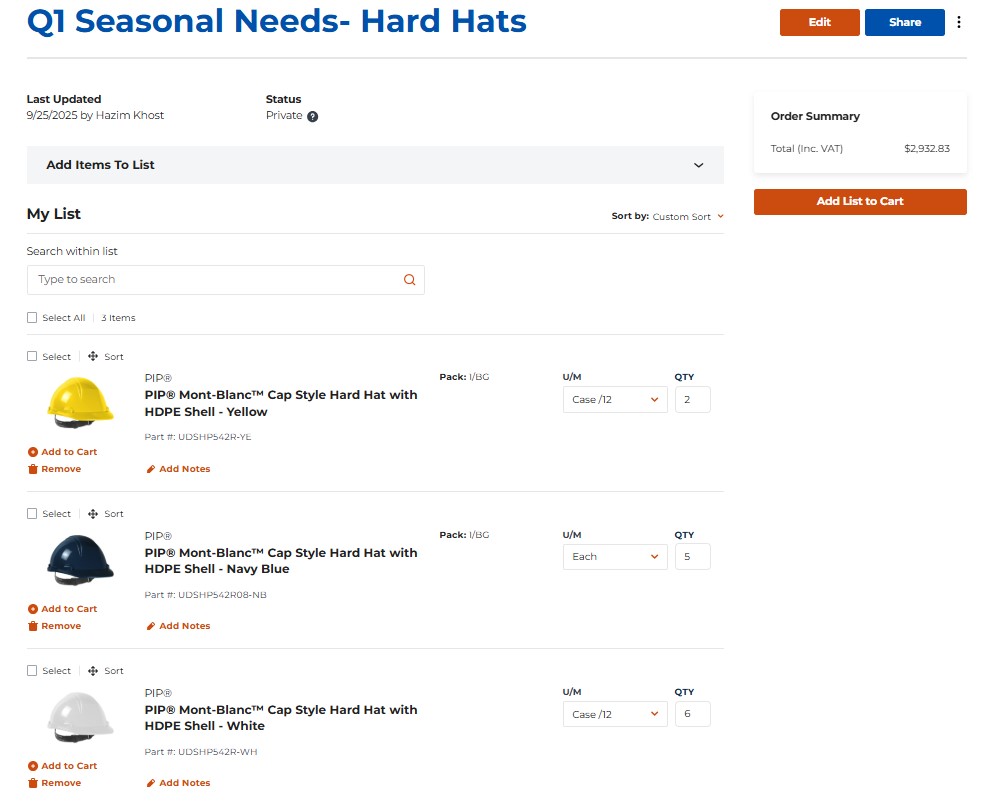
- Edit or delete items as your needs change.
- Sort and search within your lists to find products quickly.
- Add your list to the cart when you’re ready to place an order.
4. Sharing Lists
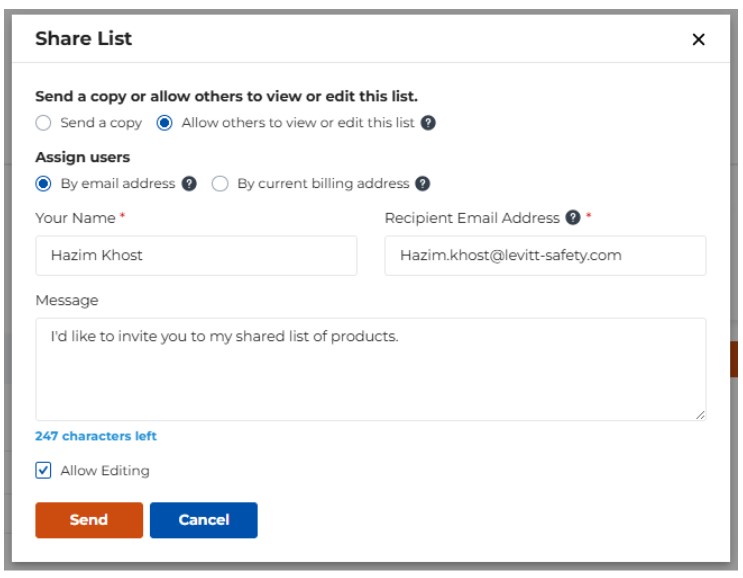
- Click the Share button to send a copy of your list or allow others to view/edit it.
- Assign access permissions:
- View Only – recipient can see the list but not make changes.
- Allow Editing – recipient can update the list contents.
- Manage sharing under the Status column, where you can add/remove users or change permissions.
Have any questions? Reach out to us at [email protected]